Wednesday, May 8, 2013

Whats in My Bushcraft Bag: Shelter

lean-to and heat reflector
Shelter could keep you warm when your cold, cool when your hot, and protect you from the sun and other things.  I have two Walmart tarps made out of a windbreaker like material, a wool blanket, and seasonably appropriate clothing.  In the winter I set the tarps up as an lean too in front of my fire with a heat reflector behind i\t.  Underneath the tarp I place a disposable space blanket.  I will photograph this set up at a later date to show you when winter approaches again.  The picture underneath is similar to the set up I use , but the roof of the shelter is the tarp and emergency space blanket set up.  I would like to replace the tarp with a Grabber Space Blanket, a S.O.L Sport Utility Blanket, or a Cabelas Sportsman's Space Blanket.  They are grommeted tarps with mylar emergency blanket on the underside. These space blankets are some winter upgrades I would like to make to my bushcraft kit..

Cabelas Sportsman's Space Blanket
S.O.L Sport Utility Blanket


Grabber Space Blankets

In the warmer months I like to set my tarps up as an A-frame and make a hammock out of my wool blanket (military surplus army blanket) under it.  I drape a mosquito net over the A-frame set up.  A mosquito net is as important in warm weather in Maine as a wool blanket is in cold weather.  You cannot have a good nights sleep getting chewed alive, and you must also protect yourself from West Nile Virus.  The picture to the right shows a set up similar to what I use minus the mosquito net.  I am going to upgrade from a wool blanket as a hammock to a two person hammock for my girlfriend and I.   I will retain the wool blanket for use as a blanket, or a hammock for Sean, and I probably still use my Walmart Tarps instead of the space blanket ones that I want for cold weather use.

Trash Bag Tarp
Another emergency shelter idea to use in place of a tarp is a 50 or 55 gallon contractor bag/drum liner.  You cut the sides and leave the bottom intact you are left with small tarp.  Tie rocks into folded over edges of the bag/liner to use in place of the grommets to secure the bag/liner.  These are a good idea for short term shelter a day to a week, or supplementing/augmenting a shelter made from natural materials  This is a cheap option at less than a dollar,  I also have a dollar store disposable poncho, and a blue dollar store tarp.  I have been using the dollar store tarp as a ground cloth for a year and it is till intact.  Until next time keep your knives sharp and your powder dry.


Tuesday, May 7, 2013

Whats in My Bushcraft Kit: Cutting Tools.

I have mentioned before that I have an Enzo Trapper knife, and I consider this my primary cutting tool.  A primary cutting tool is the cutting tool you can least afford to be without, and for most people that is a knife.  I have mentioned that a Bahco Laplander saw was my secondary cutting tool and wanted a good hatchet as a tertiary cutting tool.  I have talked about the Laplander before in a previous blog entry and hatchets as well.  In this entry I am focusing on the Enzo Tapper and other knives I have used and like.

How the Enzo came to me
My Finished Knife
My Enzo Trapper came to me as a kit for me to assemble, for half the the price of a finished knife $89 from the Omaha Knife Store.  I received the blade, the screws, and scales.  I epoxied the handles on, and tightened the screws.  I waited 24 hours and then filed down the screws.  I then shaped and sanded the scales.  This knife after a few passes on a Japanese water stone is hair popping water stone it went from really sharp to hair popping razor sharp.  This is a wonderful knife for bushcrafting, but I carry a
Laplander saw to compliment it.  This knife was not intended to be a one tool option for me for bushcrafting.

Another knife I liked that I did not intend to be a one tool option was the Becker Necker BK11.  I loved the idea of the hollow handle survival knifes from the 80s.  I liked the storage idea of the hollow handles, but knives need a full tang for strength.  I came up with the idea of putting the survival kit on the sheath with ranger bands, this gave me a a strong knife with a tang and a survival kit.  I used a magnesium bar as a combustion device, included a needle, mono-filament line for threat/fishing line, led light, can opener, a compass, and two fish hooks. I had also included a small bag of one inch lengths of jute twine smeared with mineral oil for tinder.   This was an Every Day Carry item for me for a year and for bushfrafting I paired it with a tomahawk.  I loved this knife and the tomahawk not so much.  I should mention I beat the crap out of this knife batoning and it held up.  The handles (scales) came from Tomar's Kabars.


Squared of Spine
After Market Micarta Scales
The Becker Companion BK2 I bought to be a one tool option.  A one tool option must be able slice, chop, and baton.  This knife is a half inch thick.  Some people call it a sharpened pry bar.  This knife chopped better than the tomahawk.  This knife is my first choice as a one tool option for cutting.  I have used this knife more than any other and beaten the hell out of it.  I have batoned logs into boards for fire drill sets. I configured this knife as a survival knife like the smaller Becker BK11 Necker knife. I squared the back of the spine because it was to rounded to strike a spark on a ferrocerium rod. I included a small back up knife a Gerber dollar clip knife, and used a ferrocerium rod instead of the magnesium bar for fire starting. The handles were from Tomar's Kabars. The rest of the items were the same as what was on the BK11 knife kit I had made. I loved this knife, just like the other two I had previously mentioned.


These are all of the knife options that I have tried and really liked. I would love to try about some Moras and repost back on those. I would love to hear what you think, and what is working for you. Until next time keep your knives sharp and keep your powder dry.


Sunday, May 5, 2013

Learning From Failure, But Enjoying Sucess.

I have been writing about the things I tried that did not work for me, and I learned from those experiences and adapted.  I also enjoy my successes, especially when I pull of something difficult.  It is important to challenge yourself to develop your skills.

It was a great day, Sean and I were out bushcrafting, and his mom was along taking pictures.  It had been raining for a week this last December and the highs were in the 40s and 45s.  It was misty and drizzly that day.  We decided to go out and practice putting up tarp shelters and fire making.  Sean and I put up a tarp too keep his mom dry, I gashed my finger really bad snapping off twig sized branches from a tree close to the trunk.  Colleen put on good field dressing after I put on a band aid (I was bleeding through it).  She kept me from bleeding on my first aid supplies.  She handled it like a champ.  I leaned never to snap off branches like that again, it is a job like a cutting tool or bludgeon of some kind.


We then moved on to fire making, and everything was soaked.  This is the day I showed Sean the virtues of birch bark as a tinder.  Sean learned to baton wood that day, to make kindling out of some of the dry centers of wet branches.  I showed him that preparation is the key to starting a fire in wet weather.  I put down a floor of sticks to keep the fire off the damp ground.  Then I made a bundle of shredded birch bark and put in the center a bird's nest of jute twine.  I scraped the ferrocerium rod and the spark roared to life as a giant flame as you can see in the picture to the right.  Birch bark is wonderful stuff.  I used my billy pot ($6.99 Walmart grease pot) to make everyone tea and cocoa.  It was a great day.


My Brew Kit
Here is one of the best kept worst kept secrets in bushcrafting making a
brew/billy pot out of the Walmart greast pot.  I painted my black with Rustoleum High Heat Paint to keep some of the resins in burning soft woods off it, and hide the temper and discoloration that the fire would impart on the metal hidden.  On the left is a picture of the Brew Kit I sometimes carry as additional gear.  I made the loop (bail) for the pot by drilling a hole and adding some picture hanging wire.  A piece of metal coat hanger could be used.  This was my first use of the billy pot I made that same day.  It was a good day every thing was a challenge, but everything we tried worked.  Until next time keep your knives sharp and your powder dry.

Saturday, May 4, 2013

Whats in My Bushcraft Kit: Water Containers

As I set here making a cup of tea on my coffee table with some of my bushcraft kit (Crusader Cook System and a cotton ball) and a bottle off rubbing alcohol, because my microwave died. Three things occur to me.  One my girlfriend is probably thinking, "Great, just what he needs even less technology".  Two I am not missing the microwave.  Three that every bushcraft kit and comprehensive survival kit needs a vessel to carry water and a container to boil it to make it safe to drink. 

The container should be 32 ounces (a quart or liter), or as close to it as possible to make it compatible with chemical purification methods, which are calibrated for 32 ounces, should you not be able or allowed to have a fire.  Good choices are canteen and canteen (metal) cup style combinations, or all metal water bottles like Klean Kanteen which can be put directly in the fire.  Just make sure the metal bottle is thick walled and the weld holding the bottom on is strong or the metal bottle does not have a weld.  A good example of a canteen is a mil-surplus canteen and metal canteen cup, or the Nalgene water bottle with GSI Glacier Cup with the water bottle nests in.
Klean Kanteen

Nalgene Bottle Nesting in GSI Glacier Cup


Heavy Cover Boil Cover
I use the The BCB Crusader Cook Set  See the pictures above.  It consists of the pattern 58 water bottle with drinking cup, a metal canteen cup, and a stove.  The stove can burn wood, fuel tables, and green gel.  If I use a cotton ball as a wick I can use rubbing alcohol, drinking alcohol over 100 proof, and dry gas (alcohol).  The canteen cup can be put directly on a fire without the stove.  I bought the stainless steel metal cup (cooker) instead of the nonstick one  I thought it would hold up to high heat better.  I painted the outside with Rustoleum High Heat Paint.  I would like to get a metal lid (boil cover for the metal cup from Heavy Cover.  The one that comes with it is plastic and I am afraid it would melt.  This would keep fire debris out of you water as well as reduce boil times.  They also make a lid for the current style of U.S. canteen cup, which I would like to get for Sean whom loves military gear.

I have also used the GSI Glacier Cup and Nalgene Bottle combo and love it as an inexpensive alternative.  I think everyone should own a GSI Glacier Cup for every water bottle they own.  The GSI Glacier Cups are a $12 investment, are light, and because they nestle take up very little room.  The cup and bottle are a twenty dollar investment to get started in bushcraft,  I would love to hear what you use or like in the comments section.  Until next time keep your knives sharp and your powder dry.

Friday, May 3, 2013

No Child Supervision, AKA What Not To Do With Knives

Contrary to what you probably are thinking this is not a gripe about people not supervising there kids it is the opposite, about when kids are not around adults are more likely to do things they should not because they don't want to set a bad example.  Today Colleen (my wonderful GF) and I were cleaning her shed that is attached to her apartment and we were using a paring/utility knife to cut up boxes.  She on impulse threw the knife trying to get it to stick in the wall her initial result was bang, it hit handle first.  She asked me if I could do it and I got the range on the second try and it stuck in and I go it to stick the next try to prove it was not a fluke.  With a little instruction, Colleen got the knife to stick in on her fourth try.  She was extremely excited and  I was proud of her.  I was thinking about how if her son Sean was home we would not be doing this because it is a little dangerous, and coined the term Child Supervision for when adults are kept from doing stuff they should not by the presence of a child.  The following is a penance for the unsafe behavior previously mentioned.  I don't sound too penitent, because I had a really great day.
Not Bushcrafting
Bushcrafting


THE RULES OF KNIFE SAFETY IN BUSHCRAFTING
  • Cut away from your body, not toward it.
  • If you drop your knife, let it fall. Don’t attempt to catch it.
  • Never run with a knife it must be sheathed.
  • Never walk with a knife it must be sheathed.
  • Don’t throw a knife to anyone. Hand it to them, handle first.
  • Don't throw a knife you could get hurt or damage your knife and your life could depend on it.
  • Don’t use a knife for prying. It can cause the tip to break, possibly causing injury.
  • Use in a well-lit area, so you can see what you’re doing.
  • Keep your knife clean.
  • Keep your knife oiled and sharp. A sharp knife is safer than a dull one.
  • Never stab a knife into something when you need your hands free.  Sheath it.
  • If you get cut, seek first-aid immediately.

Thursday, May 2, 2013

Learning From Failure Part 3: Tomahawks

My Cold Steel Trail Hawk
I used to have a Cold Steel Trail Hawk Tomahawk in my bushcraft kit as a tertiary cutting tool, and as you have seen it is absent from my bushcraft kit.  Why, you may ask?  For me it was a failure.  Tomahawks have been a tool/ weapon for Frontiersmen and Native Americans for many decades. They are characterized by light weight heads and longer shafts in relation to hatchets.  They only Tomahawks I entertained thoughts on using were poleaxes.  Poleaxes have a flat surface for hammering, or a hammer like projection opposite the axe head. The appeal of the Tomahawk proved more romantic than practical for me.  I know know that a hatchet is the way to go.

Pros: romantic, historic, cool factor, hammering tool, chopping tool, and light weight.
Cons: insufficient mass for chopping efficiently, small cutting surface, and long handle was a little unwieldy. 

I tested the Cold Steel Tomahawk in the freezing cold of the Maine winter and it did not even make more than superficial cuts in a two inch thick frozen pine tree.  I was actually able to chop better batoning the Becker BK2 I had with me through the branch.  Even chopping in a cleaver-like fashion I did better with the Becker BK2.  Subsequent tests proved that a ten dollar Walmart hatchet outperformed it by a wide margin.  So now I am looking for a hatchet with a forged high carbon head, leather sheath, and wooden handle.  The Condor Knife and Tool Greenland Axe look good.
Batoning With Becker BK2

Greenland Pattern Axe

Huqvarna Hatchet


Longhunter
Voyager
I did luck out that day, because even thought Tomahawk was a failure it was not an epic one.  Sean, my girlfriends son, got to learn to use a tomahawk and hatchet safely that day.  I shorted the tomahawk handle with the laplander saw and let him use it to learn.  Sean loves the current Assassin's Creed game and the main character uses a tomahawk, during the Revolutionary War period.  Even though tomahawks were a failure for me, he still wants one so I am thinking the Voyager and Longhunter tomahawks by 2Hawks are the only viable options for tomahawks.  They look like their heads have twice the mass of the cold steel tomahawk I had.

Remember to learn from your failures, and evolve your techniques and kit as a result.  Until next time keep you knives sharp and your powder dry.

Wednesday, May 1, 2013

Bushcraft Kit for Maine Spring, Fall, and Winter


In Maine we have four seasons we call them mud season, tourist season, deer season, and snow season.  I have heard they roughly equate to the rest of America's spring, summer, fall, and winter.  My current bushcraft kit is configured for the colder months of the year.  In Maine the winters can be pretty brutal. Many nights it is zero before the windchill.  You have to get out of the wind and stay warm.  A bushcraft kit should be adequate for indefinite survival or having enough gear for a fun trip into the woods.   You can think of a bushcraft kit as extreme minimalist camping.  I am rebuilding my bushcraft kit after my previous one was stolen during home invasion.  I want to share the evolution of gear as I rebuild it with you.

This is what is currently in my pack before I adjust it for warmer months.  I will go into greater detail on each item in my kit later, explaining more about each item in later entries.

This is the backpack I keep the kit in. The kit fills all the side and top pouches. The large center portion is empty with room to hold food and clothes.  The rolled up wool blanket is part of the kit.  I believe this is a must have item in the Maine woods in the cold seasons.  This was a great bag that L.L.Bean stopped making around ten years ago.  I paid $49 for this bag and it is still kicking.


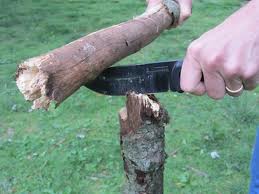
My primary cutting tool is an Enzo Tracker knife and I love it.   O1 high carbon steel with a scandi grind.  My secondary cutting tool is a Bahco Laplander saw, which is the benchmark that all other folding survival saws are measured.  It is high quality and only cost around $25.


I use the BCB Crusader Cook System and Patten 58 Water bottle.  My secondary container is the ubiquitous nalgene water bottle in blaze orange.  The BCB kit has a stove and metal canteen cup for boiling water and plastic cup for drinking out of.


I have my First Aid Kits I & II and my Cordage Kits in a used Crystal Light container sealed with electricians tape.  These containers can be used for extra water containers.  The First Aid Kits hold gauze, pads, band aids, tape, and field dressings.  The Cordage Kit is wrapped in dollar store high visibility nylon twine and inside is the dreaded jute twine, paracord, electricians tape, and duct tape with roll flattened.


I also have a Shelter Kit containing two tarps from Walmart, they were about $10 each, and are made of a blue grommeted windbreaker material.  The Fire Kit contains an assortment of lighters matches and tinder contained in my Crystal Light containers.  The kit also contains a good ferrocerium rod that costs about $10.

My Food Procurement Kit consists of three yoyo automatic fishing reels and three wire snares.  I also have some snare wire (dollar store picture hanging wire) in my Miscellaneous Supplies.  In my Miscellaneous Supplies I also have a bandana, duct tape, MRE beverage bags, Chapstick, a needle, and thread.

Around my neck I carry a my compass on a length of papacord is is a Silva compass that I have had for 22 years.  I also carry a multi-tool the Gerber Suspension.    I also have additional gear I pack from time to time, like hiking binoculars for Colleen, and a Brew Kit for me.   I would love to hear comments on what people think I am missing and should have.  This Bushcraft Kit is an evolving thing and I would love feedback.

Until next time keep your knives sharp and your powder dry.